Data concealment using steganography
Steganography is a broadly utilized system that controls data to conceal their reality. The word steganography is gotten from the Greek words “stegos,” signifying “cover,” and “grafia,” meaning “writing,” characterizing it as “covered writing.” Steganography is one such pro-security development in which secret information implanted in a cover. Steganography is an art and science of communicating in a manner that conceals the presence of communication. Even though Steganography furnishes excellent security, you can use it with Cryptography for better confidentiality and security.
When concealing a message inside a picture without changing its remarkable properties, you can adjust the hidden data in “noisy” areas with many color varieties so that less consideration will be attracted to the adjustments. The most widely recognized strategies to make these adjustments include the utilization of the least-significant bit or LSB, Blocking, and Palette Modification on the cover picture. LSB substitution is the way toward adjusting the least critical bit of the pixels of the carrier picture and blocking works by breaking up an image into “blocks” and utilizing Discrete Cosine Transforms (DCT).
Each block divided into 64 DCT coefficients that rough luminescence and color — the values of which are adjusted for concealing messages. Palette Modification replaces the available hues inside a picture’s color palette with shades that represent the hidden message. You can use these methods with varying degrees of progress on various kinds of image files.
In this article, we will discuss and implement some Steganography techniques mentioned above to hide secret messages into image files.
Steganography Using CMD
This instructional exercise shows a step-by-step guide on one of the proficient methods to conceal messages inside the picture utilizing only a command prompt in Windows OS. The technique doesn’t require any extra software or advanced technical knowledge. So, without further ado, let’s get started.
Hiding texts in the image file
Find an image and a document that you want to conceal and place them in a folder.

Now, open the CMD (Command Prompt) and navigate to the folder where you keep your original image and a secret document.
Ex: (cd C:\Users\ITDep\Desktop\New folder).
Next, type the following command to combine the image and a secret document into a stego image, and then specify a name to output the result as a “JPG” file. In our example, we named the stego image as “secret-image.jpg.”
Ex: (copy/b “C:\Users\ITDep\Desktop\New folder\desert.jpg”+”C:\Users\ITDep\Desktop\New folder\New Text Document.txt” secter-image.jpg).

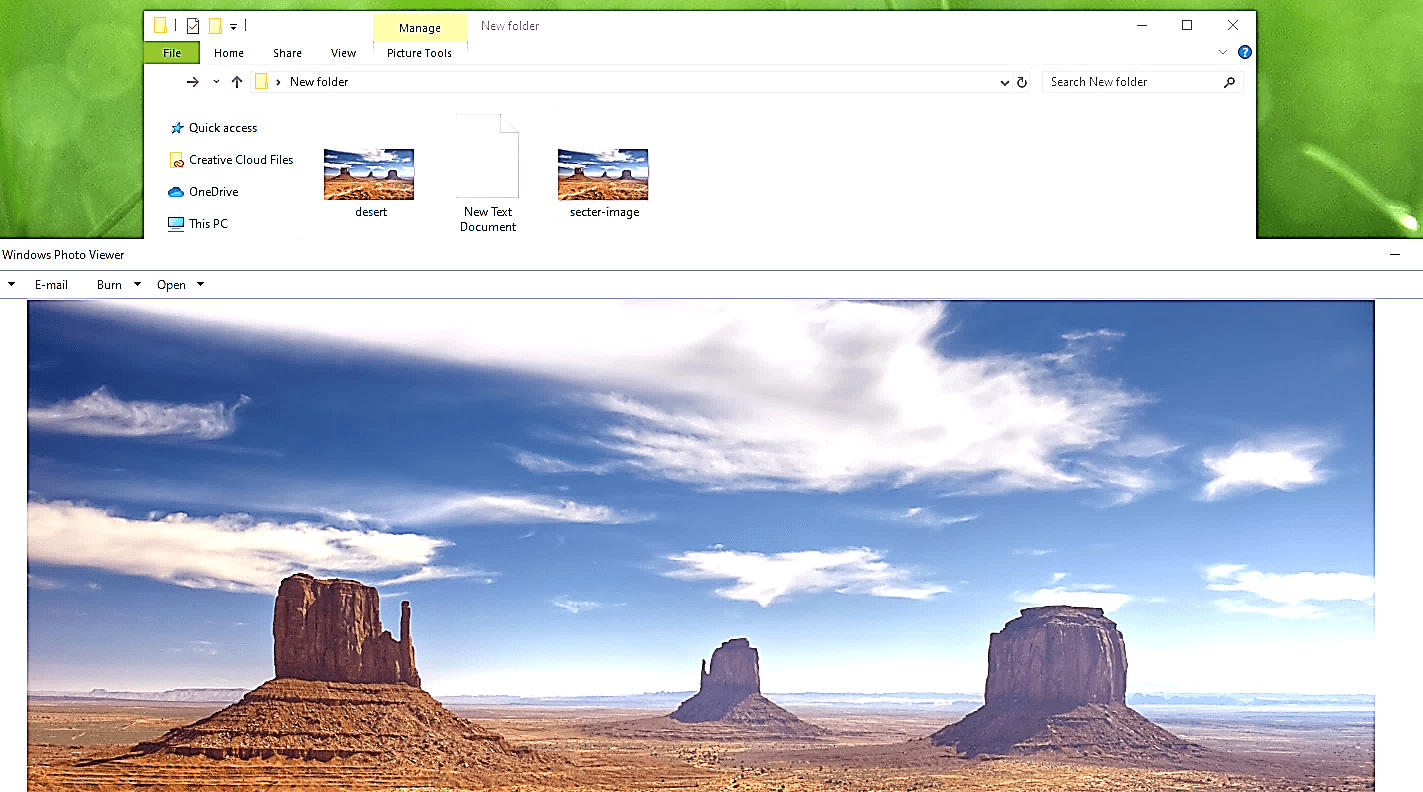
The screenshot below shows that we successfully managed to create a stego image, and it looks just like an original one.

To read the secret message from the stego image file, you need to open it up with a notepad or similar application and scroll down to the bottom of the page. There you’ll be able to view and read the document you’ve embedded into the image.

Hiding texts in the text file
Another cool technique that we can use in the command prompt is useful to hide text files within the text files.
For this, we need to create a “TXT” file first. Here, we named it as “message.txt” file, which incorporates a simple text message. Next, from the command prompt screen, navigate to the folder where the “message.txt” file resides.
Ex: (cd C:\Users\ITDep\Desktop\New folder).
Now, use the following command to create a new text file within the “message.txt” file.
Ex: (C:\Users\ITDep\Desktop\New folder>notepad.exe message.txt:secret_message.txt).
It will open up a new notepad application where you can put your secret message. Once you place your confidential information, exit out.

The secret message will be embedded in the “message.txt” file. When you open up that file, you won’t be able to view or read the inserted text except for the original one.

To read the secret message and display it on the screen, we need to run the same command.
Ex: (C:\Users\ITDep\Desktop\New folder>notepad.exe message.txt:secret_message.txt).

