Nessus - Vulnerability assessment Tool
Nessus is one of the conventional vulnerability scanners utilized during vulnerability assessments and penetration testing commitment, including malicious assaults. Nessus is the world’s most prominent vulnerability scanning tool and upheld by the more significant part of the research groups around the world. The instrument is free of expense and non-commercial for non-enterprises. Nessus uses the web interface to perform scans and view reports. It has one of the most significant vulnerability databases, and in light of this database, the device is prevalent. Nessus bolsters a broad scope of operating frameworks that incorporate Windows XP/7, Linux, Mac OS X, Sun Solaris, and so on.
The latest version of Kali Linux comes pre-installed with this tool; search for Nessus and click on the “Nessus start” application.

Open the Nessus in the browser; it usually runs on port 8834 on localhost (https://127.0.0.1:8834/). At the first startup, it will begin the initialization process.

After the initialization process is complete, you will be greeted with a login screen. Provide your credentials and hit “Enter” to sign in.

If you don’t remember or don’t know your username and password, follow the next steps to create one.
To add a new username, type “nessuscli lsuser” and then provide the new user.
Ex: (root@kali:~/Downloads# /opt/nessus/sbin/nessuscli lsuser).

To add or change the password, type the “nessuscli chpasswd” command followed by the username and hit “Enter.” You’ll be prompted to provide a new password.
Ex: (root@kali:~/Downloads# /opt/nessus/sbin/nessuscli chpasswd art).

The Nessus UI is mainly comprised of two principle pages: the “Scans” page and the “Settings” page. These pages allow you to oversee scan configurations and set up the scanner as indicated by how you might want it to perform inside your framework. You can get to these pages from the top panel, as shown in the screenshot below. To start a new scan project, click on the “New Scan” button located in the top right corner.

Nessus gives you a bunch of choices with regards to running the actual vulnerability scan. You’ll have the option to examine singular PCs, scopes of IP addresses, or complete subnets. There are more than 1200 vulnerability modules within the Nessus, which allows you to indicate an individual or set of vulnerabilities to test. As opposed to different scanning tools, Nessus won’t expect specific services running on regular ports; instead, it will attempt to exploit the vulnerabilities.
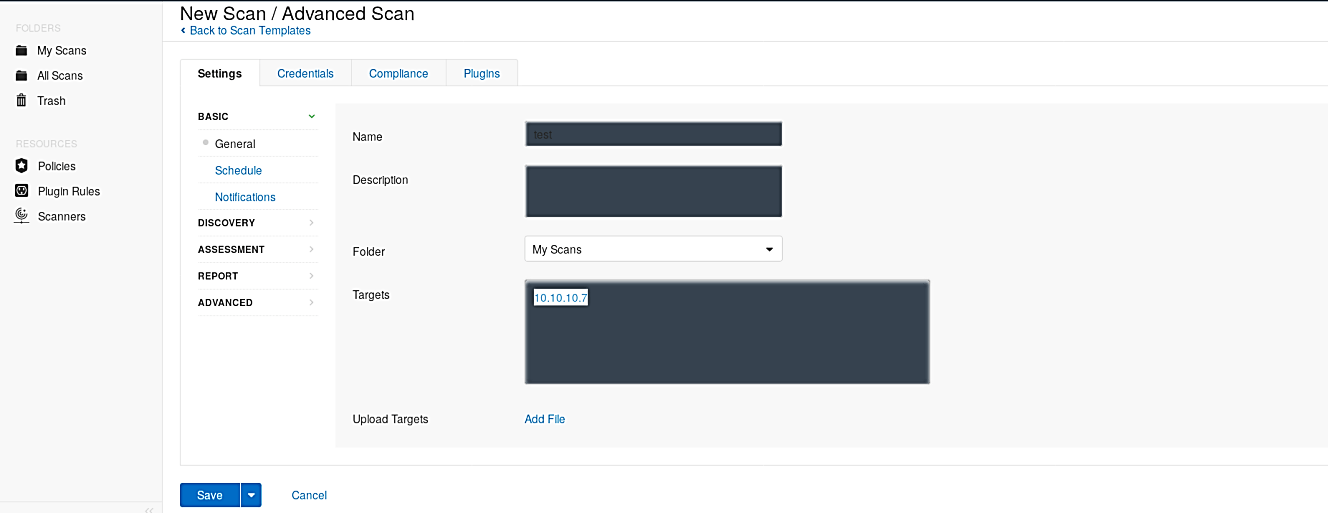
Let’s select the “Advanced Scan” template and begin the vulnerability scanning on our network.

Nessus is adapted to perform scans on multiple targets separated by commas or published in CIDR format. Specify your target IP address, and click on the “Save” button.
Once everything is configured correctly, locate your scan project and click on the “play” icon to start the scanning process on the target.

After the scanning is complete, you will be presented with the report summarizing the severity levels and instances of issues discovered.
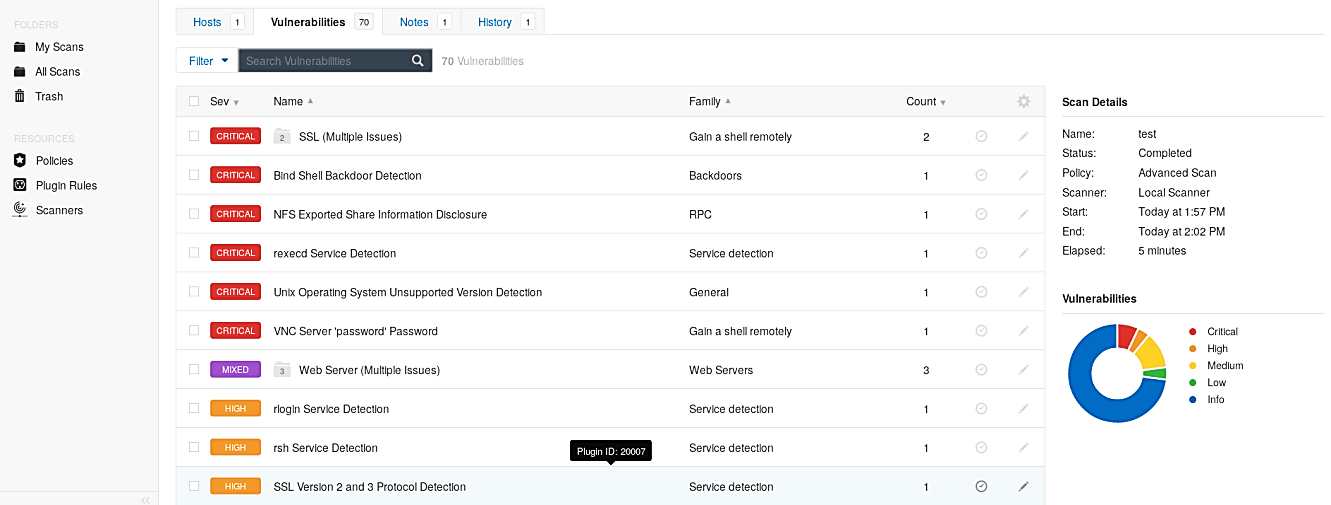
Nessus even enables you to drill down to explicit hosts and vulnerabilities and get more data on how they were found, together with recommendations on the most proficient method to fix obvious problems.

The Nessus Scanner is one of the most widely recognized scanners in the cybersecurity business today. The usefulness that you get, particularly with the business variant, is the total guarantee of significant worth for your cash. While it is likewise critical to affirm your vulnerability hits by running other scanners against your objectives to wipe out the likelihood of any false positives, Nessus’ capacities justify its fame.