Open source vulnerability assessment tool - OpenVAS
OpenVAS is a full-highlighted vulnerability scanner. Its abilities incorporate unauthenticated testing, validated testing, different high-level and low-level Internet and industrial protocols, execution tuning for enormous scope filters, and an incredible inward programming language to carry out a vulnerability test. When utilizing Kali Linux for OpenVAS scanning, we should always consider the resource usage. Regardless of whether you are running Kali in a virtual machine or on the bare metal, you will need to have adequate memory and CPU accessible for the scanner to be advanced for speed.
If you are planning to run vast quantities of parallel scans, at that point, you will require more assets. Various execution tuning alternatives are accessible in the OpenVAS scanner configuration file to better utilize the assets you have available. For more information on OpenVAS instructional exercise and modifying the configuration document, visit the “https://hackertarget.com/openvas-tutorial-tips/” page.
If you haven’t, as of now, ensure your Kali Linux distro is updated and install the most recent OpenVAS.
Ex: ( root@kali:~# apt-get update),
(root@kali:~# apt-get dist-upgrade),
(root@kali:~# apt-get install openvas).
When done, run the “openvas-setup” command to setup OpenVAS, download the most recent standards, make an administrator client, and start up the different services. Contingent upon your data transfer capacity and PC assets, this could take some time.
Ex: (root@kali:~# openvas-setup).
Toward the finish of the setup, the automatically-generated secret key for the administrator client will be displayed. Make sure to note it down.

Once “openvas-setup” completes its process, the OpenVAS manager, scanner, and GSAD services should be listening. To be sure and see whether all these services are running, you can use the “netstat” command.
Ex: ( root@kali:~# netstat –antp).

On the off chance that you have already configured OpenVAS, you can necessarily begin all the essential services by running the “openvas-start” command. Open up your browser and type “https://127.0.0.1:9392.” Accept the self-signed SSL authentication and use admin credentials to log in to the Greenbone Security Assistant webpage.

In case if you forgot to note down the password you can change the admin password using the following commands:
Ex: (openvasmd –user=[username]–new-password=[password]),
(openvasmd –user=admin –new-password=[password]).
Your credentials, targets, and scan configurations are set up, so now you’re ready to put everything together and run a vulnerability scan. In OpenVAS, vulnerability scans are conducted as “Tasks.” When you set up a new task, you can further optimize the scan by either increasing or decreasing the concurrent activities that take place. Click on the “Scans” tab and select the “Tasks” option.

Next, click on the star icon and select the “New Task” option.

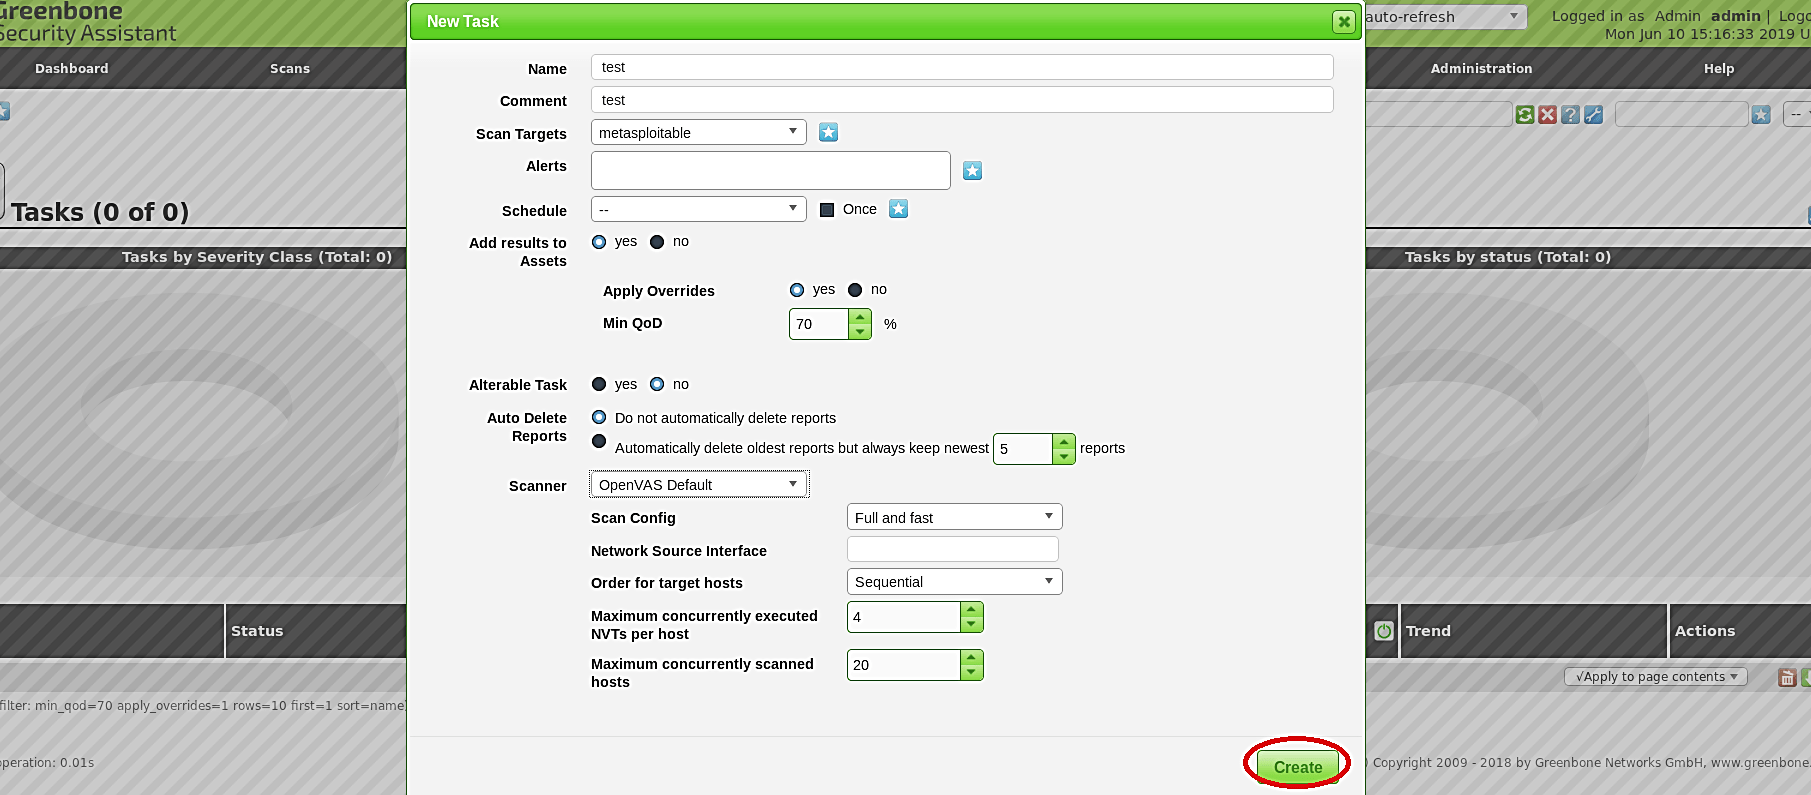
In the “New Task” window, provide all the necessary information and click on the “Create” button.
Once you created the task, click on the play icon to start the scan process.

Depending on the computer’s configuration, this process may take a while. When it finishes the scan, the status of the task will be displayed as “Done.” Click on the “Scans” tab and select the “Results” option to view all possible vulnerabilities regarding your target.

OpenVAS has many moving parts, services, and setup things. If you have any issues with the various services, visit the “https://hackertarget.com/openvas-instructional exercise tips/” page for OpenVAS instructional exercise and guide that incorporates different tips for keeping an OpenVAS establishment running efficiently.